

By Dave Porter, Technical and Customer Support at The Bonneville Shop
A Guide to Cables
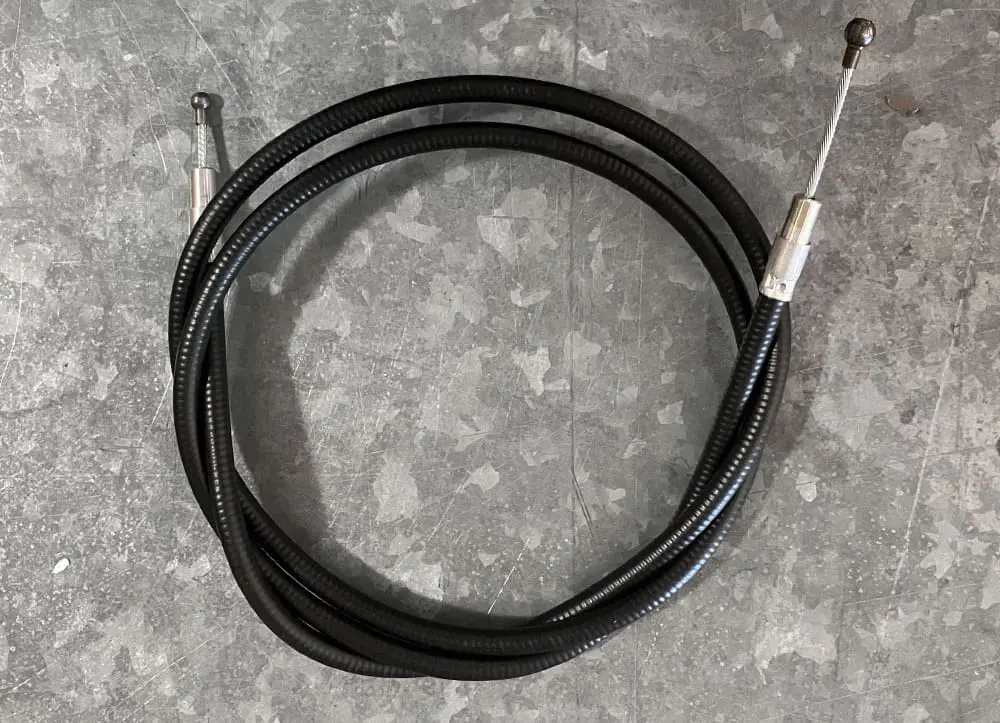
As a customer service tech advisor, I have observed that control cables are products that have been historically somewhat problematic for the end user to deal with and seem to generate consistent inquiries about proper fitment and operation on the various applications on a motorcycle. What could be so complicated about fitting a simple control cable? I’d like to share some of my experiences with throttle, clutch, and brake cables as they apply to vintage British motorcycles.

Guide to Cables: Throttle cables
Factors to consider:
- cable anchor position
- throttle grip assembly
- handlebars
- cable routing
“We all know that there are many changes that are made over the long lifespan of a vintage motorcycle, some very subtle [and] some changes were not…”
Throttle cables are perhaps the most complicated cables to fit due to variables in the handlebar dimensions, throttle twist-grip manufacturers, cable routing, and inner wire free length required for proper carburetor throttle slide function. When a cable manufacturer specifies an original part number for a throttle cable (or any other cable for that matter), the cable is constructed to the original overall length, sheath length, and inner wire free length under the assumption that the cable will be fitted to an original stock motorcycle for which that part number applies to.
We all know that there are many changes that are made over the long lifespan of a vintage motorcycle, some very subtle, such as the cable anchor position on an aftermarket throttle twist grip assembly compared to a factory original Amal 364. This difference can alter the desired inner wire free length downstream at the carburetor’s throttle slide and have an effect on the ability of the slide to completely drop to the resting position in the mixing chamber of the carburetor.
Some changes were not as subtle, such as a higher-rising or wider, non-original handlebar fitted to the motorcycle. This will have an effect on the overall length of the throttle cable and may require a custom-made cable to get the fitment right. The routing of the cables also has an effect on the proper operation of throttle cables and can make a cable seem too short if it is not correctly routed under the petrol tank and free to move without being pinched.
One scenario that is somewhat common is when a new Amal Concentric carburetor fitted with top cap adjusters is installed on a Triumph twin, and there is not enough inner wire free length for the original cable to let the slide drop all the way. From the factory, the throttle and choke cable barrel adjusters were omitted from the carburetor caps. They were drilled out and the special shouldered “top hat” cable ferrules sat directly in the drillings, adding back the 5/16” of free length needed to allow the slide to drop to the bottom resting position. I use a 15/64” drill bit for this procedure.
BSA and Nortons from the late 1960s to the mid-1970s retained the adjusters, as they had sufficient clearance under the petrol tank to not interfere with cable fitment. A Triumph twin throttle cable is readily identified by the shouldered ferrule and inline cable adjuster.

Guide to Cables: Clutch Cables
Factors to consider:
- cable routing
- cable ties
- control levers
- handlebars
- lubrication
“In many cases, there were different specifications for handlebar fitment depending on the intended market the motorcycle was produced for.”
Clutch cables are subject to heavy loads and must be lubricated at the nipples on both ends of the cable wire. The barrel that fits into the bore on the control lever needs to freely rotate and not bind at all. Sometimes it is helpful to lightly file the outside of the barrel if it is prone to binding. When the clutch lever is pulled in to disengage the clutch, the lever is working against the load imposed by the clutch springs and a bound cable barrel will cause the inner wire to worry back and forth until it finally work-hardens and starts to fray.
Like throttle cables, clutch cable routing is critical to the operation of the clutch. Large, sweeping bends helps prevent friction between the cable inner wire and sheathing, which will help produce a much lighter pull at the clutch control lever. Cable ties are useful for maintaining cable routing, but heavy-duty “zip ties” can be overtightened around the clutch cable, resulting in unwanted friction.
When ordering a clutch cable for your vintage motorcycle, be mindful of the effects of aftermarket control levers and handlebar dimensions. In many cases, there were different specifications for handlebar fitment depending on the intended market the motorcycle was produced for. Most Home-market (UK-spec) models were fitted with lower handlebars. The US-specification models with wider and taller handlebars would usually require a longer clutch cable. Some of the parts books from the mid-1960s onward discern between the Home-market and US-specification cables, but not all.

Guide to Cables: Brake Cables
Factors to consider:
- cable routing
- lubrication
- brake shoes
- handlebars
“If the front brake cable seems to have too much free inner wire length, this may be a sign that the brake shoes are worn and require replacement.”
Brake cables are subject to the same lubrication requirements as clutch cables and should also be inspected after installation to ensure the barrel swivels easily in the control lever. Again, if the barrel is bound up in the lever, it will eventually fail where the barrel is molded to the wire. Routing most front brake cables is straightforward but pay attention to the cable’s position to make sure it doesn’t get squashed between the steering stop lug on the headstock and the lower fork yoke. 1969-1970 BSA and Triumph twin-leading shoe brake plates have a linkage that can be adjusted to optimize the brake shoe and actuating cams interface.
If the front brake cable seems to have too much free inner wire length, this may be a sign that the brake shoes are worn and require replacement. As the friction lining material on the brake shoes diminishes, the brake control lever has to pull more cable, resulting in a soft front brake. This can be adjusted out to a degree by using the inline adjuster on the cable, as well as the barrel adjuster on the control lever. As is the case with throttle and clutch cables, variations in handlebar dimensions will also have an effect on the fitment of the front brake cable.
Hopefully this blog will help explain how to avoid some of the pitfalls when ordering cables for your BSA, Triumph, or Norton vintage motorcycle. Thanks for reading!
Brit Bike Cables FAQ
Why doesn’t my new throttle cable fit my vintage Triumph, BSA or Norton?
Replacement cables are built to the original overall length, sheath length and inner wire free length for a stock motorcycle. Decades of changes can make a correct part-number cable seem wrong. The usual causes are non-original handlebars, an aftermarket twist grip with a different cable anchor position than the original Amal 364, a non-original carburetor, or poor routing under the petrol tank. Start by checking your handlebars and controls, then compare your bike against the specs on our Triumph cables, BSA cables and Norton cables pages.
What is inner wire free length, and why does it matter?
Inner wire free length is how much bare inner wire sticks out past the end of the cable sheath. On a throttle cable, it decides whether the carburetor’s throttle slide can drop all the way to its resting position in the mixing chamber. Too little free length holds the slide open, which raises the idle and makes it hard to synchronize twin carbs. Our product listings give overall length, sheath length and free length so you can compare them with your old cable. For example, the Barnett 1968–1972 Triumph 650 clutch cable has 3″ of free length.
Why won’t my throttle slide close after fitting new Amal Concentric carbs to my Triumph?
New Amal and Wassell Concentric carburetors usually come with barrel adjusters screwed into the carb tops, but original Triumph twins didn’t use them. At the factory, Triumph drilled out the carb tops so the shouldered “top hat” cable ferrules sat directly in the holes. That gained the 5/16″ of free length the slide needs to close fully. To fit an original Triumph cable, remove the adjusters and open the hole with a 15/64″ drill bit. Watch the steps in our video on how to fit new Concentric carbs with old cables, and see our Amal carb fitment guide for cable setup and synchronizing twin carbs.
How can I tell a Triumph throttle cable from a BSA or Norton throttle cable?
A Triumph twin throttle cable has a shouldered “top hat” ferrule at the carburetor end and an inline cable adjuster. BSA and Norton models from the late 1960s to the mid-1970s kept the adjusters in the carb tops, because they had enough room under the petrol tank. For example, the 1971–1974 Norton Commando upper throttle cable is set up for carb top adjusters. Shop by bike in our Triumph carburetor and fuel and Amal carburetor sections.
Do I need longer cables if I change my handlebars?
Usually, yes. Taller or wider bars, like US-spec high-rise or Western bars, need longer throttle, clutch and front brake cables. Lower bars, like UK-spec or clip-ons, may need shorter ones. To measure, route a length of 1/4″ or 3/8″ twisted polypropylene rope where the cable will run, then measure the rope. Our article on handlebar changes and cables explains the method and what else changes on 1969-and-later models. Browse bars and levers in Triumph, BSA and Norton handlebars and controls.
What is the difference between UK-spec and US-spec cables?
The difference is length. Most Home-market (UK-spec) British bikes had lower handlebars, while US-spec bikes had wider, taller bars and usually need a longer clutch cable. Some parts books from the mid-1960s onward list the two cables separately, but not all of them do. For example, the Barnett 1973–1982 Triumph 750 clutch cable is made for US-spec high-rise bars. Check your model in our Triumph, BSA or Norton parts books before you order.
Why does my clutch cable keep fraying or breaking at the lever?
A clutch cable usually frays at the lever because the barrel nipple is binding in the lever. When you pull the lever against the clutch springs, a stuck barrel bends the inner wire back and forth until the wire hardens and the strands break. Make sure the barrel turns freely in the lever bore; lightly filing the outside of the barrel can help. Lubricate the nipples at both ends of the cable. If the lever itself is worn, replace it with a new one from our Triumph clutch and primary or handlebars and controls sections.
How can I make my clutch pull lighter?
Route the cable in large, sweeping bends. Tight bends add friction between the inner wire and the sheath. Don’t overtighten heavy-duty zip ties around the cable, because squeezing the sheath adds drag. Keep the cable lubricated and make sure it’s the right length for your handlebars. A premium nylon-lined cable, such as those in our Barnett range, also helps. One example is the Barnett 1971–1975 Norton Commando clutch cable.
How should I lubricate motorcycle control cables?
Lubricate the nipples at both ends, then push lubricant through the sheath with a pressure cable luber, such as the Universal Cable Pressure Lubing Tool (PN TBS-01-001) in our workshop tools. Use a lubricant made for control cables. Louis advises against putting oil in Teflon-lined cables, because the liner can swell and stiffen. Venhill recommends lubricating road bike cables once or twice a year. On throttle cables, disconnect the carburetor end before lubing so no lubricant runs into the carb, as Motion Pro notes.
Why does my front brake feel soft or have too much free cable?
Extra inner wire free length on a drum front brake usually means the brake shoes are worn. As the lining wears down, the lever has to pull more cable, and the brake feels soft. You can take up some of the slack with the inline cable adjuster and the barrel adjuster on the lever. If the shoes are worn, replace them from our Triumph brakes, BSA brakes or Norton brakes sections. On 1969–1970 BSA and Triumph twin leading shoe brakes, the linkage between the two cams can also be adjusted for better shoe contact.
How should I route a front brake cable on a vintage British bike?
Most front brake cables route simply. Just make sure the cable can’t get squashed between the steering stop lug on the headstock and the lower fork yoke when you turn the bars lock to lock. After installing, check that the barrel nipple turns easily in the lever. A stuck barrel will eventually break where the barrel is molded onto the wire. If you’re reusing an original brake light switch on a 1969–1970 Triumph or BSA, the Barnett front brake cable without switch is made for that job.
What if no off-the-shelf cable fits my bike?
You can build a custom cable. Throttle and choke cables are easy to make in a home workshop with a 40-watt soldering iron, paste flux and thin 60/40 rosin-core solder. Our step-by-step guide to creating a custom motorcycle cable explains how. Start with the Barnett universal throttle cable kit (53″ housing). For shop-level work, add the Barnett cable fitting assortment kit. If you’d like help sizing a cable, contact our tech support team or call 720-570-7884, Monday–Friday, 9–5 MT.